Official Grade Submission with LMS Tools
Instructions for Submission:
1. Navigate to the Niagara College Portal at: https://portalnc.niagaracollege.ca
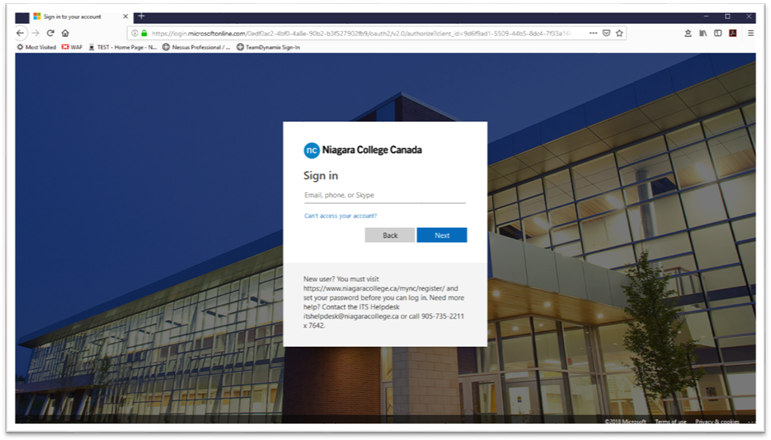
2. If you are not currently already logged in, you will be brought to the Microsoft Login screen for the College as shown below:
3. Once logged in, or if one has already logged in and skipped the previous screen, you will be brought to the main Portal screen as show below:
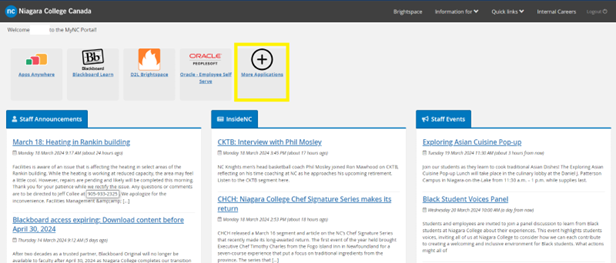
4. Click on the More Applications icon (the one with the plus symbol in a circle). This will bring the user to the More Applications screen and display the full listing of applications available to the user in the Portal as show below:

5. Click on the All section to expand the icon listing.
6. Navigate down to the Oracle – LMS Tools icon. It is displayed below, highlighted in yellow:
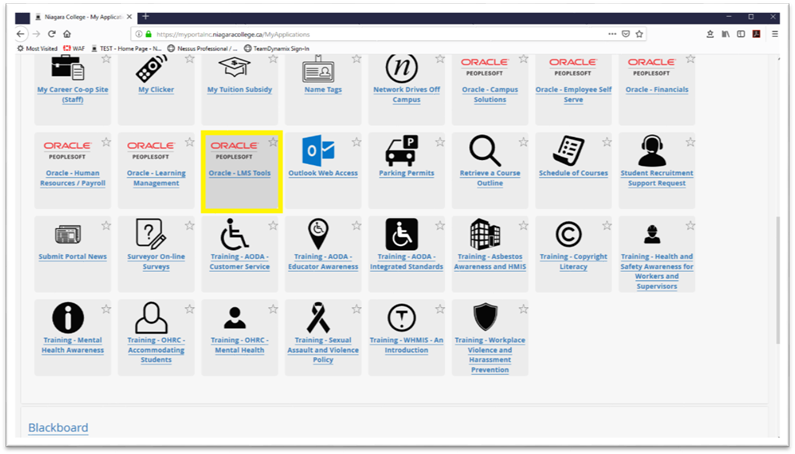
NOTE: The Oracle – LMS Tools icon might also be on the main page after login if the star had been selected previously to bookmark the icon. It also is listed under the Oracle PeopleSoft section. These are all the same icon and, in each case, will bring the user to the same location within the College’s Oracle PeopleSoft system.
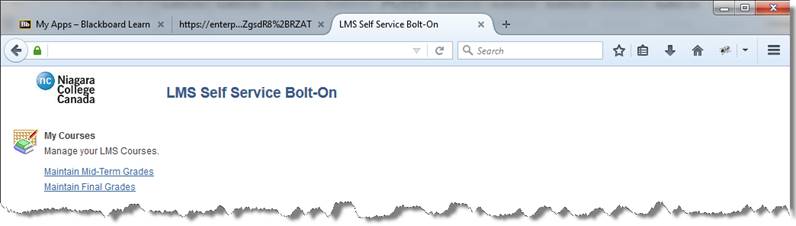
7. Clicking on the Oracle – LMS Tools will bring the user to the LMS Self Service Bolt-On will appear as shown below.
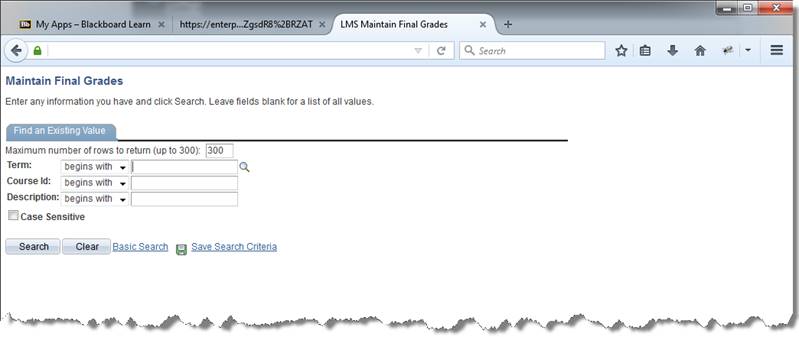
8. You will be taken to a search page where you will need to search for the desired course from the list of courses you are currently assigned to as an instructor.
9. One of the best ways to see a list of courses which you are teaching for a given term is to search my courses by Term. To do so, enter the given term value into the Term field and click the Search button.
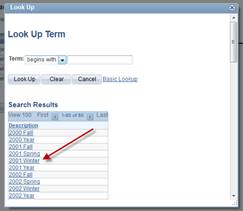
Tip: If you are unsure what the appropriate term value is for the given term click the lookup icon () next to the Term field to see a list of available values (as shown below) and select the desired value from the list.
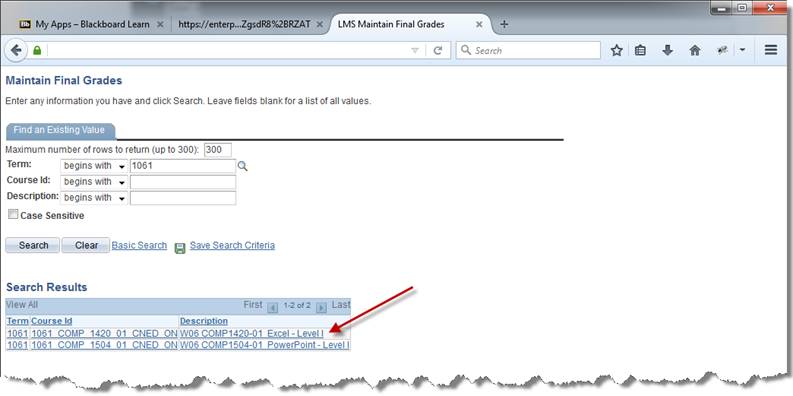
10. Select the desired course from the Search Results list as shown below.
11. Once you select a desired course you will be taken to the Grade Entry page where a listing of your students currently enrolled in the course will be displayed.
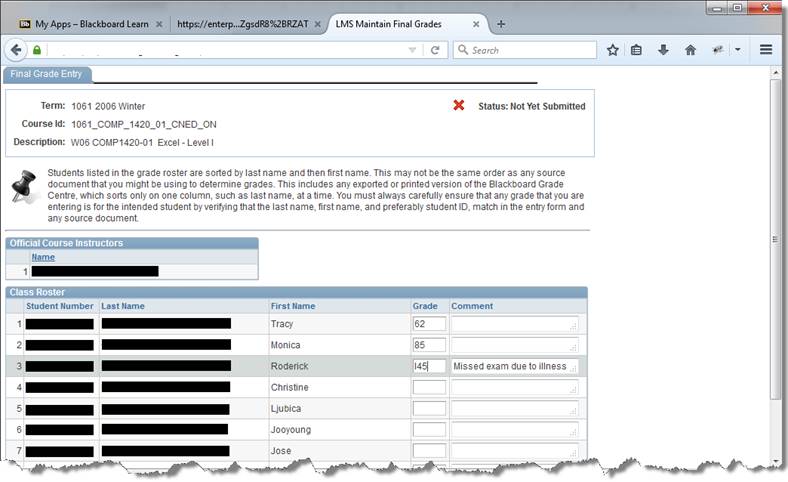
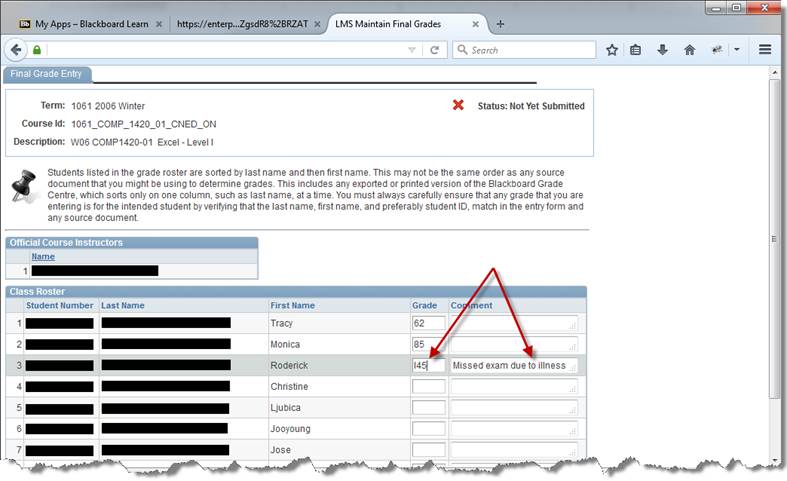
12. For each student, enter their grade within the Grade field.
13. When you have completed entering grades for all students in the class, click the Submit button located at the bottom of the grade entry page to submit your grades. If you prefer to only enter grades for some students and finish at a later time, click the Save button instead.
14. Once you click the Submit button, a confirmation window will appear as shown below, asking you if you are absolutely sure you want to submit your grades. If you wish to do so, click the Yes button, otherwise click the No button to return to the grade entry page.
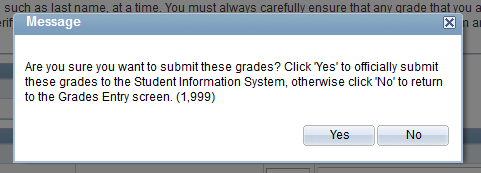
Note: Grades will not be officially submitted to the Student Information System until a grade has been entered for every student in the course and the Submit button has been clicked. Once grades have been officially submitted any changes must be made through the Official Change of Grade Form available at the Registrar’s Office.
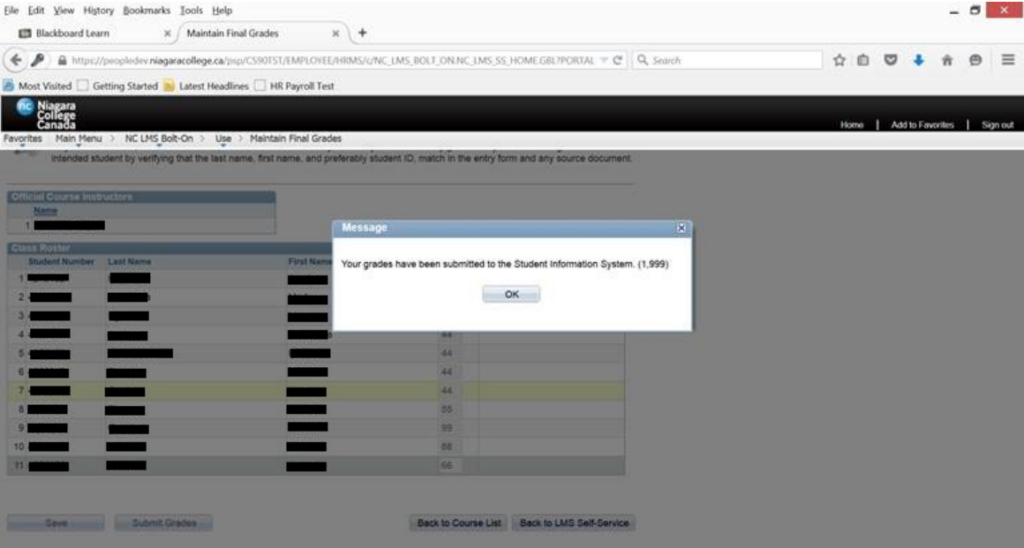
15. Once you have submitted the grades for a course, you will receive the confirmation window. Click the OK button.
16. It is recommended that you also print a hard copy of your grades.
a. Microsoft Edge – from the browser, select File and Print.
b. Firefox – on your page, right click, This Frame, Print Frame.
c. Chrome – on your page, right click, select Print.
17. Navigate to the bottom of the page and click either Back to Course List or Back to LMS Self-Service.
Frequently Asked Questions
Q. Why can’t the grades be automatically transferred from the Brightspace Grade Centre as the official grades? Why do I have to manually enter the official grades?
A. The official grades entry interface has been designed to allow teachers flexibility when assigning official grades. For example, when:
• Entering a grade as “Incomplete” e.g. I45.
• Rounding a student’s final grade e.g. rounding a “49.5” to a “50”.
Q. Can I still enter my grades if I have collapsed my courses?
A. Yes, if you have collapsed multiple sections into a single Brightspace course, you will be able to enter the grades for all the sections at the same time.
Q. When are official grades made available to students?
A. Once you submit your grades, an overnight process is run that will ‘Post’ these grades to the students’ grade report.
Q. How can I change a student’s grade, once it has been submitted using Brightspace?
A. Once grades have been officially submitted any changes must be made through the Official Change of Grade form available at the Registrar’s office.
Q. Who can I contact for help?
A. For questions regarding submission of official mid-term or final grades, please contact the Office of the Registrar.
For questions regarding the Brightspace Grades tool, please contact the cae at [email protected].
For questions regarding the Oracle – LMS tools application please contact the Service Desk at [email protected].
Entering Incomplete Grades
If an incomplete has been assigned to a student, you must precede the student’s grade with an “I”. Incompletes are only valid for final grades.
For example, if the student would receive a 45% once the grade lapse period expired, then you would enter a grade of “I45” for that student. 45% is the current evaluation attained at the time of final grade entry. For non-numerical grades (S, U) the same applies.
Note: Students have 90 days following the end of the term to complete their course work and have a grade assigned. If a student meets the course requirements and a grade is assigned prior to 90 days, the professor must complete the Official Change of Grade form and send it to the Registrar’s Office to have the incomplete removed and the new grade assigned. Otherwise, after 90 days, the grade will be automatically changed from an “I” to the evaluation attained at the time an incomplete was assigned.
Optional: If you have assigned an incomplete for a student, you can enter a reason in the comment as shown below: