Printing with Follow Me Print Queues
With the addition of the Papercut ‘Print Deploy’ application it is now recommended that Staff use the Black and White or Colour Follow Me printing instead of installing a specific printer for their area.
The Black and White and Colour queues are installed by default, and no other installation is required.
Follow Me printing provides several benefits over printing directly to a print queue:
- Single generic print queue! (You never have to add a printer again)
- Ability to release your job from any Xerox MFP or Print Release station from any NC campus location
- Security: Confidential documents are not left sitting on a printer
- Environmental Impact: Saves paper by eliminating accidental print jobs or forgotten jobs
Step 1: Print your document to the BlackAndWhite or Colour queues. These are automatically installed on ALL NC provided laptops, and all lab computers.
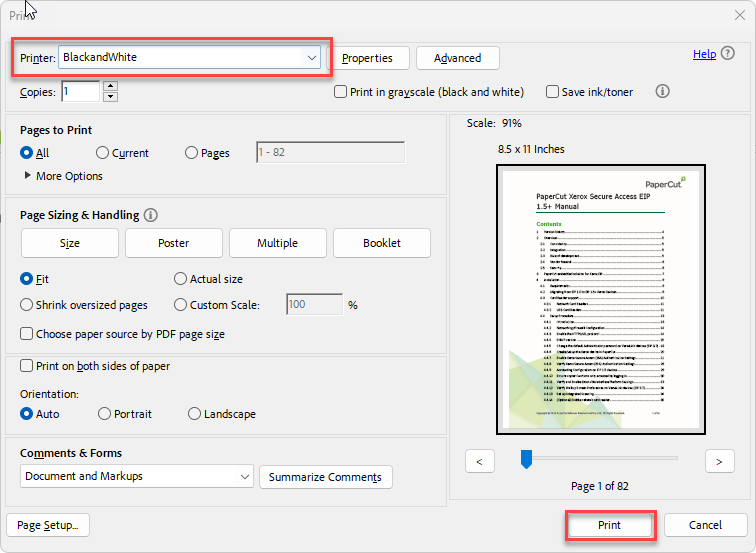
When the PaperCut Account Selection window appears, choose the shared account you would to charge the job to and press “Print”
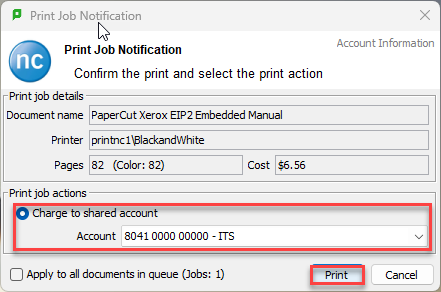
Step 2: Log into the Xerox Copier by tapping your NC card on the attached reader or by pressing the keyboard icon and signing in with your NC credentials.
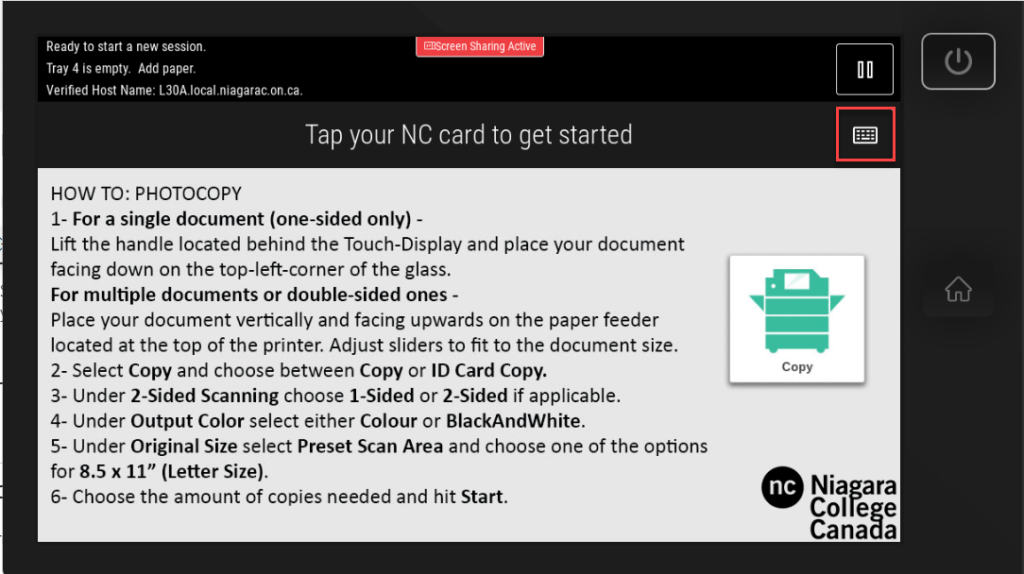
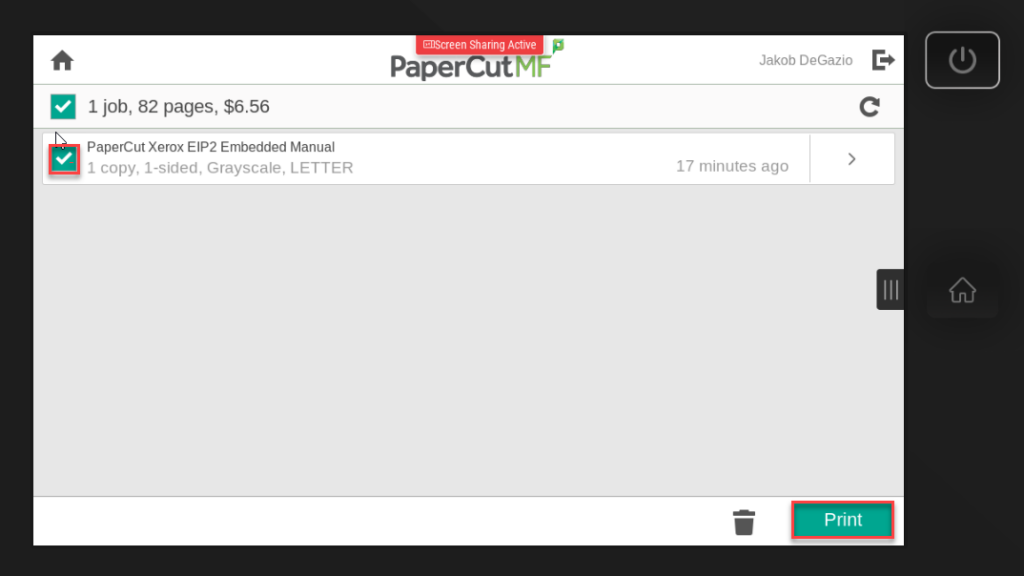
Step 3: Press the “Print Release” icon on the screen or tap ‘Print all” to automatically release all your pending jobs.
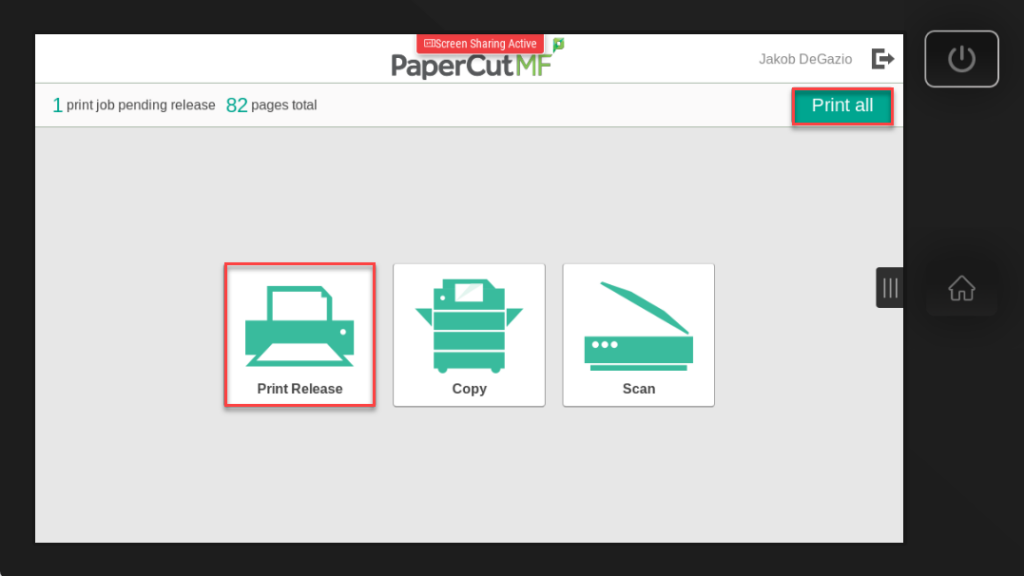
You can also check off individual jobs to print if you don’t want to release all the jobs sent, or if you accidently printed something you don’t want to release.
How to add Printers via Papercut Print Deploy
*** Please note *** it is now recommended that Staff use the Black and White or Colour Follow Me printing instead of installing a specific printer for their area.
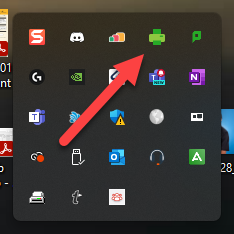
Step 1: Launch the Papercut Print Deploy Client from the taskbar by right clicking the Printer Icon and clicking “View my printers”.
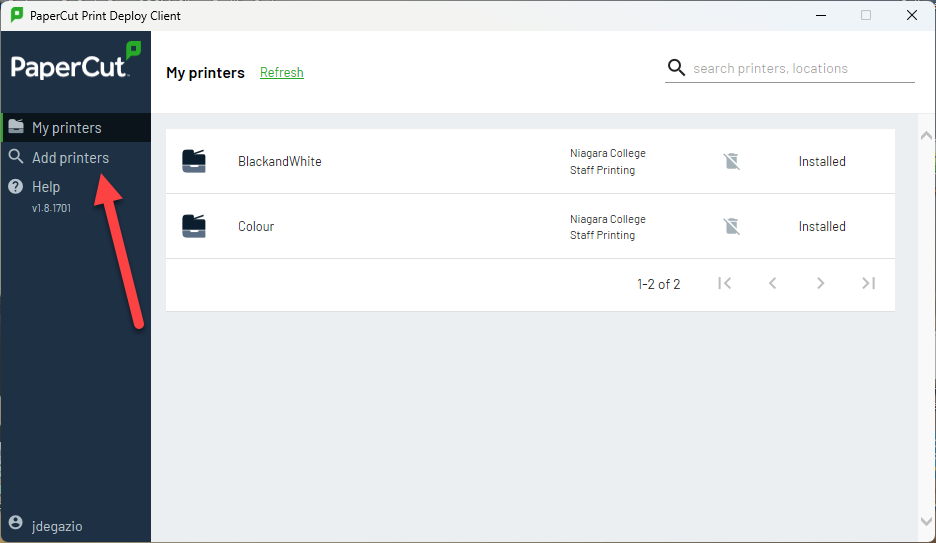
Step 2: From the Papercut Print Deploy Screen, click “Add Printers” from the sidebar.
Step 3: Find the printer you want to add from the list, or search for the printer name in the top right corner and click ‘Install’.

NOTE: Multi-Function Printers on server MFPNC1 are shown on the list first, and printers on server PRINTNC1 will be at the bottom of the list. The list is sorted alphabetically by printer name.
Step 4: Success! Your selected printer is now installed.
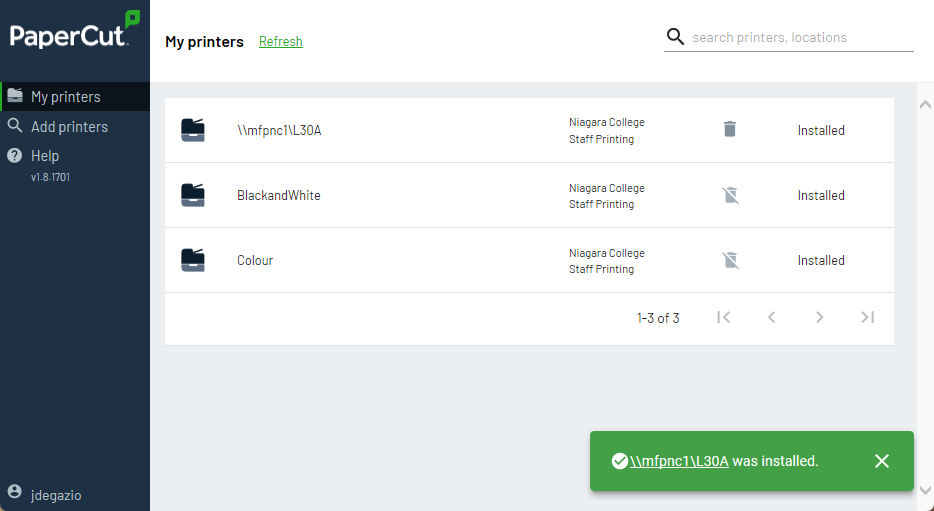
You can see the printer successfully installed in the list
If you have any questions or issues, please contact the IT Service Desk at x7642 or [email protected] for assistance.

