Getting Started
(To download this page .PDF format click here.)
Signing in
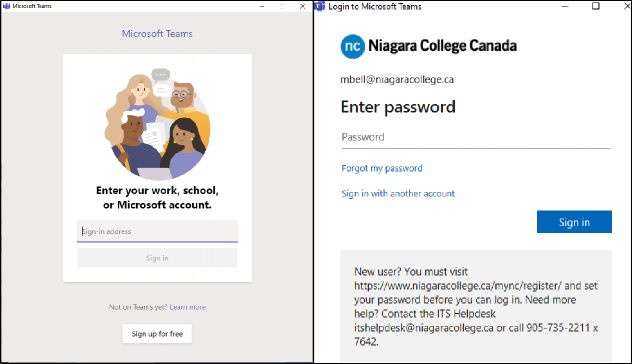
Launch Teams and sign in using your Niagara College email address ([email protected]) and password. You can download Teams here if required.
Multi-factor Authentication
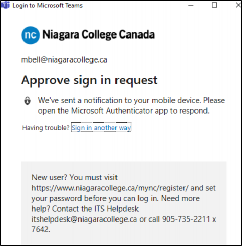
When signing in off campus, you may be prompted to confirm your identity using Multi-factor authentication (MFA). You will approve the sign in via text, phone call or authenticator app.
More information on MFA can be found here.
Chats
One-on-one Chats
You can create chats by selecting New chat at the top of your chat list.
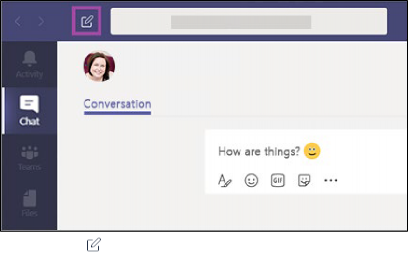
Once you’ve selected New chat in Teams and entered the person’s name, compose your message in the box at the bottom of the chat. When you’re ready, select Send . This starts the chat.
Group Chats
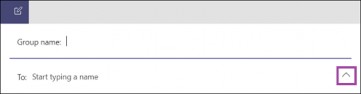
Start one the same way you start a one-on-one chat: select New chat in Teams at the top of your chat list. Select the down arrow to the far right of the To field and type a name for the chat in the Group name field. Then, type the names of the people you’d like to add in the To field.
This starts a new conversation.
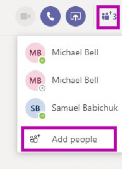
Everyone who has access to the group chat can send messages. You can include up to 100 people in a group chat. To see who’s in a group chat, hover over the number of participants in the chat header to show a list of everyone’s names.
To add people to a chat, click on Add people in the top-right, then type their name or email address.
Chat Features
Managing Chat
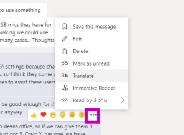
When you mouse-over a message a horizontal tray will appear, containing reaction icons and a more (…) menu. From the (…) menu you can see who read the message, delete or edit messages, or save the message.
Formatting Messages
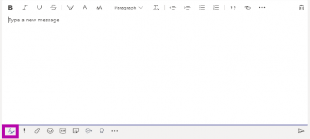
When chatting, you also have the option to format your messages. To open your formatting options, select Format beneath the box where you type your message. You’ll get a larger message box with many of the formatting options you’d see from Word.
Video and Audio Calls
You can start video or audio calls with group or one-on-one chats.
To start a video call with your chat, click the video camera icon in the top-right of the chat window. The icon will be greyed out if you do not have a camera on or connect to your device.

To start an audio call with your chat, click the phone icon in the top-right of the chat window. Everyone in the chat will receive the call.
Once in the call, you will have the option to (from left to right in the image below) share video, mute/unmute your microphone, share your screen, more menu (…), show/hide conversation, show/hide participants, and hang up.

In large chats, it’s a good idea to mute your microphone unless you’re actively speaking.
Screen Sharing
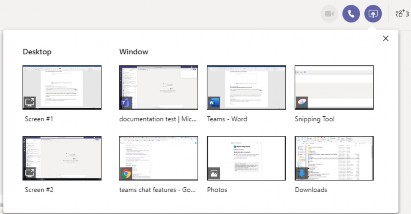
Much like video and audio calls, you can share your screen with people in your chat by clicking the screen share icon (screen with an up arrow) in the top-right.
You will have the option to choose which screen to share (if you have more than 1) or the option to share an application window only. A red border will appear around anything you’re sharing to the chat.