Creating & Editing Microsoft Teams
(To download this page in .PDF format please click here)
Topics covered in this article:
How to Create a new team
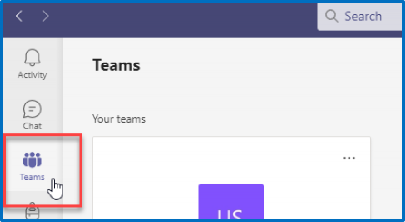
1. Open Microsoft Teams and in the left column select the Teams tab.
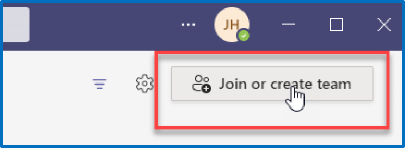
2. In the top right corner click the “Join or create team” button.
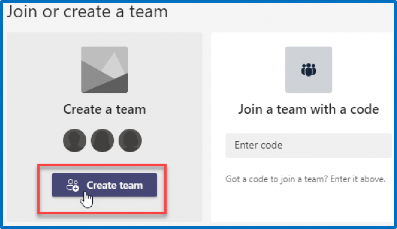
3. Click the “Create team” button.
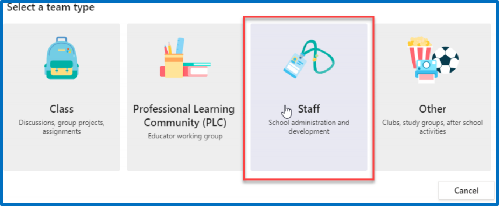
4. Select the type of Team you wish to create.
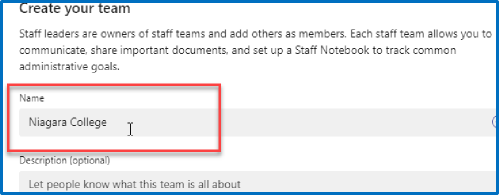
5. Type in the name you wish to call your Team.
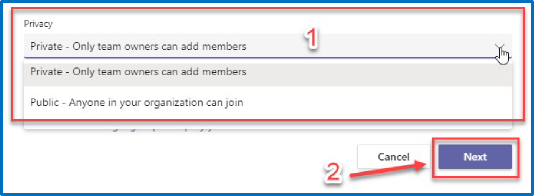
6. Select the Privacy setting. Make sure to select “Private” unless public is absolutely necessary.
“Private – Only team owners can add members” This option enables granular access control for the Teams site, restricting both the ability to see and access the site to only those with access. Depending on the type of site, the owner will be able to add different types of users to the teams site including additional owners to assist with administration, as well as site users either individually, or by group.
“Public – Anyone in your organization can join” NOT recommended except for very specific applications. This option publishes the Teams site publicly and allows anyone with a Niagara College account to access the site, including employees, and all student accounts.
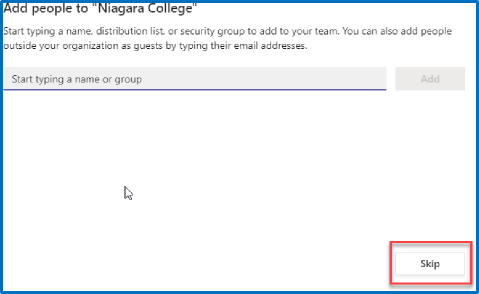
7. You will now be prompted to add users to your Team. If you wish to skip this step, click the “Skip” button now. Users can be added later after your Team is created.
8. If you wish to add members to your Team, either type in their name or username and select them from the dropdown list.
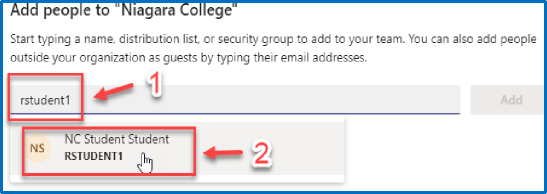
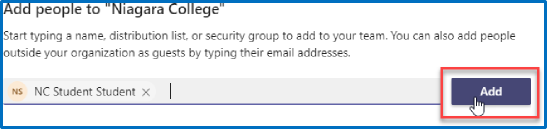
9. Click the “Add” button to add them to your Team.
10. Repeat steps 8 and 9 until all users have been added to your Team.
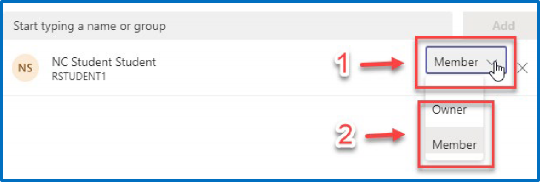
11. If you wish to change the status of a user, Click the dropdown for “Members”. You will be able to select “Owner” or “Member”. An “Owner” will have the ability to edit your Team.
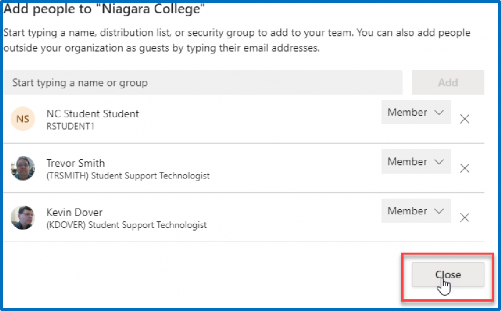
12. If you have added a user my mistake, click the “X” to the right of the user to remove them from the list.

13. To complete the creation of your Team, click the “Close” button at the bottom right corner.
14. Your Team will appear under the “Teams” tab in the Right-Side pane. Click on your Team to begin.
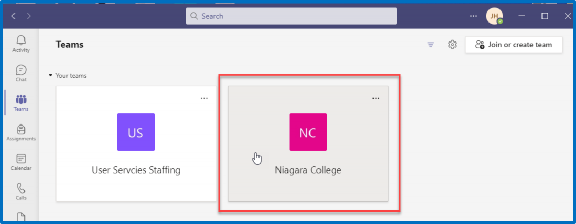
How to add users to your Team
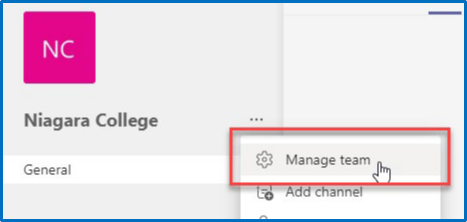
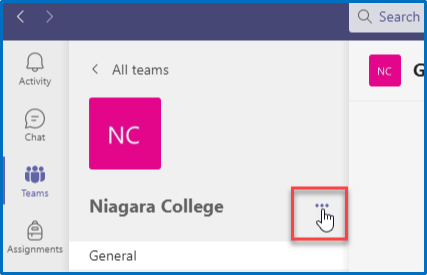
1. Once you have opened your Team, click on the 3 dots to the right of your Teams name.

2. This will give you a dropdown menu. Select “Manage team”.
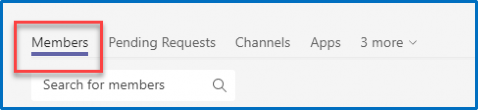
3. Select the “Members” tab, near the top of the right-side pane.
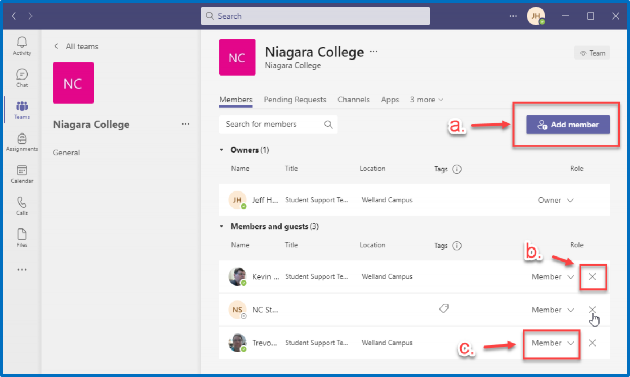
4. This area will give you the ability to do the following:
a. Add a user to your Team.
b. Remove a user from your Team.
c. Change the Status of a user in your Team.
How to edit the settings of a team
1. Once you have opened your Team, click on the 3 dots to the right of your Teams name.
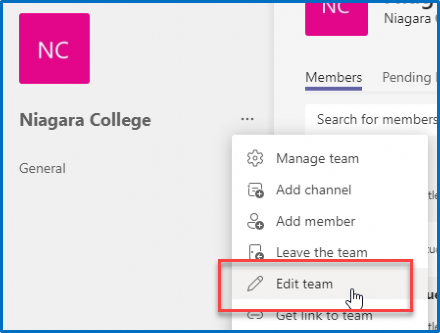
2. This will give you a dropdown menu. Select “Edit team”.
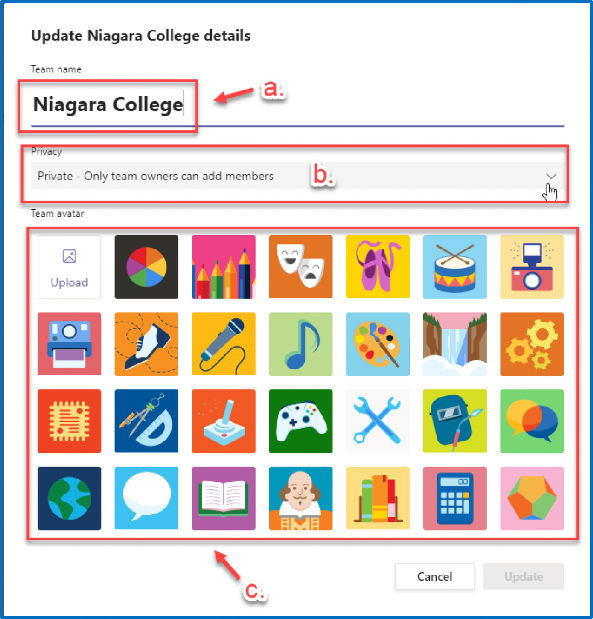
3. This area will give you the ability to do the following:
a. Change the Name of your Team.
b. Change the Privacy Setting of your Team. Make sure to select “Private” unless public is absolutely necessary.
“Private – Only team owners can add members” This option enables granular access control for the Teams site, restricting both the ability to see and access the site to only those with access. Depending on the type of site, the owner will be able to add different types of users to the teams site including additional owners to assist with administration, as well as site users either individually, or by group.
“Public – Anyone in your organization can join” NOT recommended except for very specific applications. This option publishes the Teams site publicly and allows anyone with a Niagara College account to access the site, including employees, and all student accounts.
c. Change the Avatar of your Team.