What is Multi-Factor Authentication (MFA)
Setting Up Multi-Factor Authentication
Configure your Microsoft Authenticator App
Configure SMS or Voice Calling
Configure a Yubico Security Key
How to update or add additional MFA options
Setting up your Yubico Security Key
You must create your security key and give it a unique PIN before you can sign in to your work or school account using the key. You may have up to 10 keys registered with your account.
***Please be aware that your are require to setup a different authentication method before you can add the Yubico Security Key. If this is the only option available to you, please contact the Niagara College IT Service Desk for assistance.***
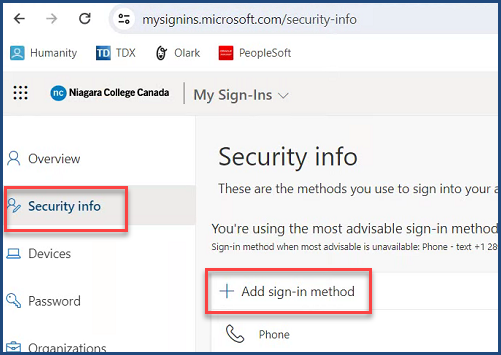
1. Go to the My Profile page at https://aka.ms/mfasetup and sign in with your Niagara College login.
2. Select Security Info tab in the left menu and select the Add sign-in method.
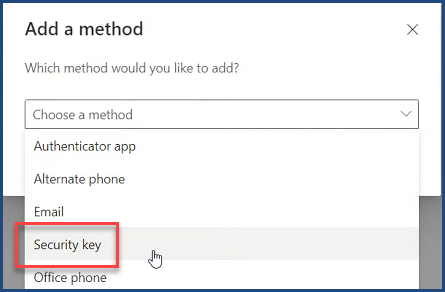
3. From the drop down list, select Security key.
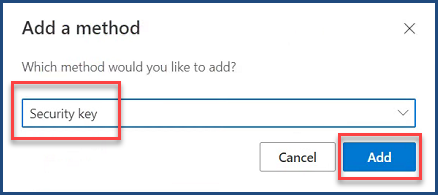
3. Click the Add button to continue.
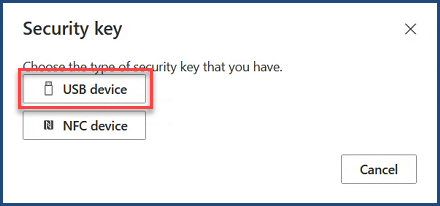
4. Select the type of security key you have, either USB device or NFC device.
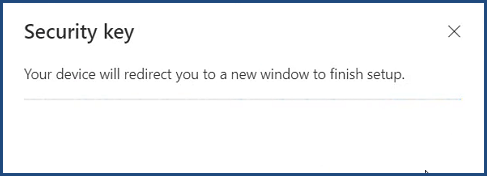
5. Have your security key physically available and then in the Security key box, select Next.

6. You will then get a notification saying your device is being redirected to finish the setup process.
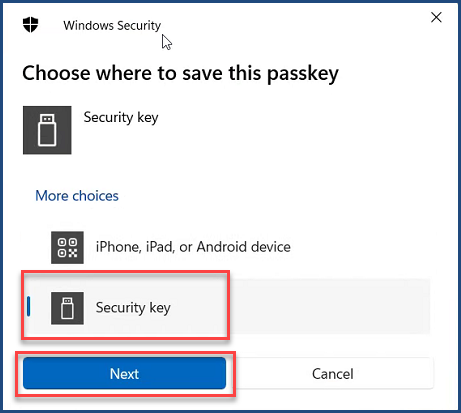
7. Select where you wish to save your passkey. Select Security Key and click the Next button.
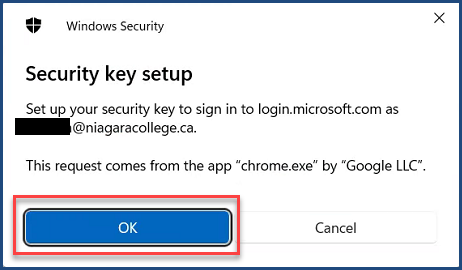
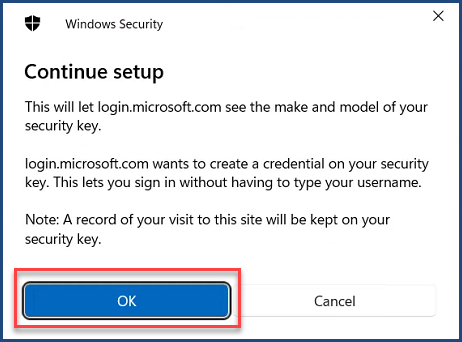
8. Select OK for the next two popups windows to continue the setup process.
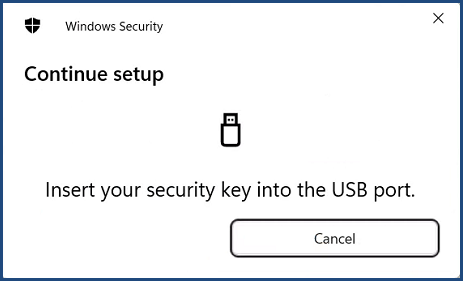
9 a. If your security key is a USB device, insert your security key into the USB port of your device.
9 b. If your security key is an NFC device, tap your security key to your reader.
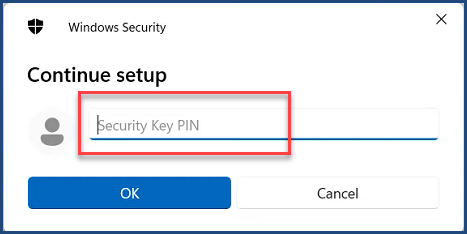
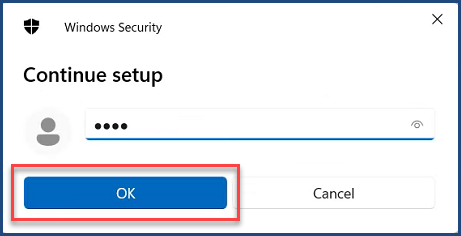
11. Type a unique security key PIN into the Windows security box, and then select OK.
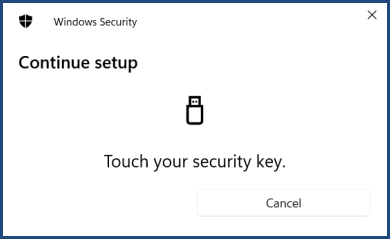
12. Click the physical button on the Security key to continue.
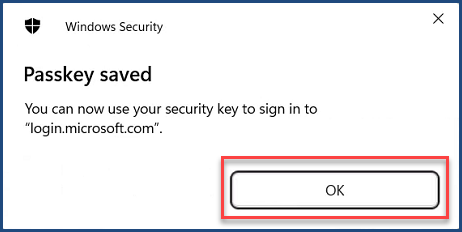
13. Your Passkey has been saved. Click the OK button to continue.
9. You will then be prompted to enter in a name for your security key. Click the Next button to continue.

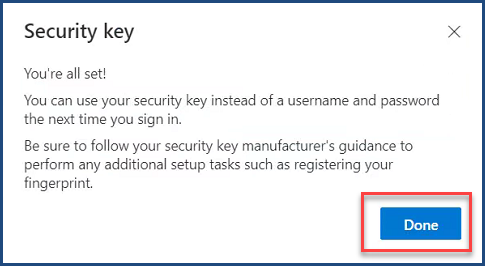
10. Your security key is registered and ready for you to use for signing into your Niagara College account. Click the Done button to continue.
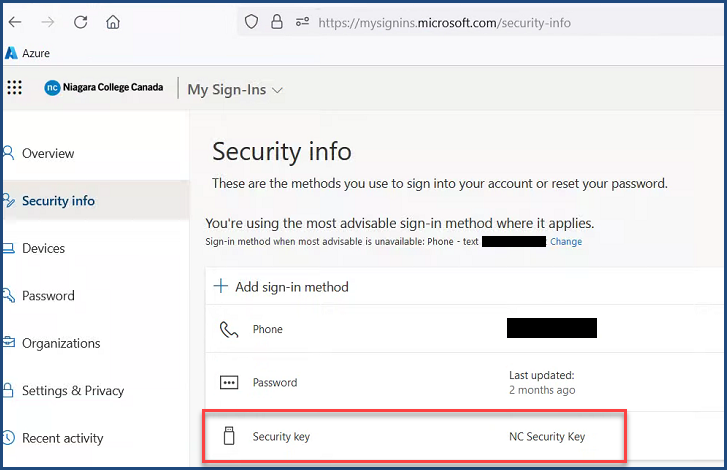
11. The Security info page is updated with your security key information.